
Building a Wood-fired Masonry Oven
First rows of the vault bricks in place, support framing has been removed, and will be replaced for the next set of arch bricks. In this oven construction we used a mixture of high percentage fireclay mortar for the vault and sidewalls. Portland-type cement would not endure the temperatures produced in this baking situation.
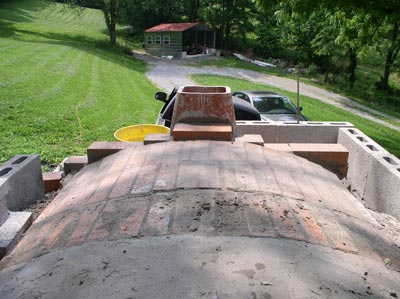
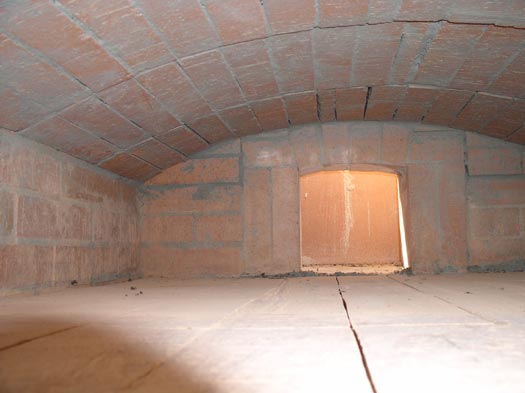
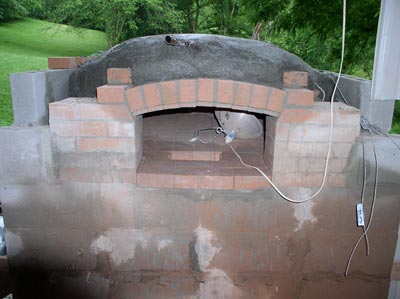
(Above) Continuing back toward the chimney with the runs of fire brick for the oven vault; and (right) a view inside of the finished oven showing the vault, the back wall of oven, and chimney flue opening. The side walls are 7 1/2 inches high; the arch of the vault is 11 1/2 inches at center. The shallow height of the arch produces efficient baking of the breads by radiant heat stored in the dome masonry. Coupled with the convection heat from the surface of the hearth, it stimulates oven spring of the loaves, and browns the top surface of the bread.
In the image above you see the copper tubing conduit for the analog thermometer, and one of the dome's thermocouple wires poking through the concrete mass. In the image at right you will notice the copper conduit for steam injection coming through the front of the cladding. Eventually, this will extend through to the face of the oven inside the bakery.
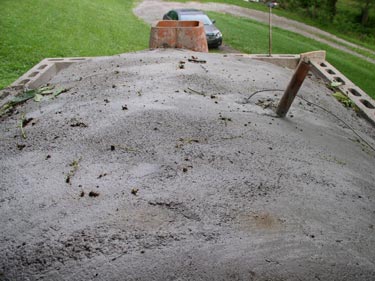
In the image below you can see the concrete mass being built up to about 4 inches in thickness over the 4 inches of brick already in place in the vault, totaling about 8 inches of mass. Before the concrete was poured, a 1/4 inch 6x6" wire mesh was fitted over the bricking for reinforcement within the concrete.
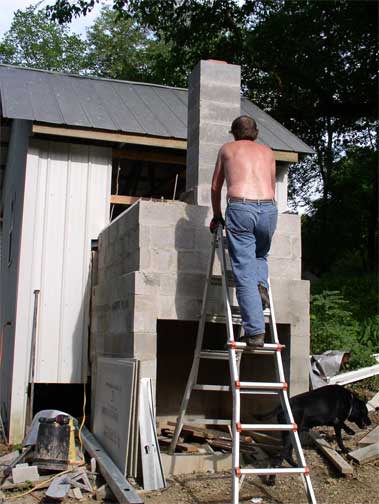
Ever-present Inspector Jeremiah checking out the sturdiness of the ladder. Remaining flue tiles have been cemented above the specially designed flue entry from the oven (see discussion on previous page), and prefab concrete chimney blocks are now in place.
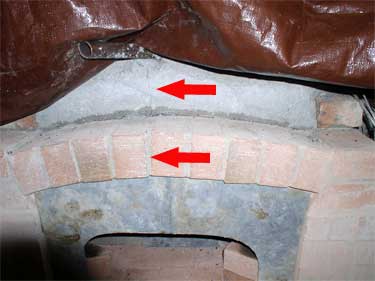
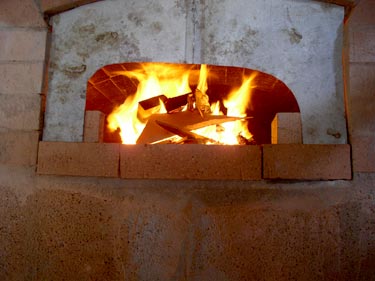
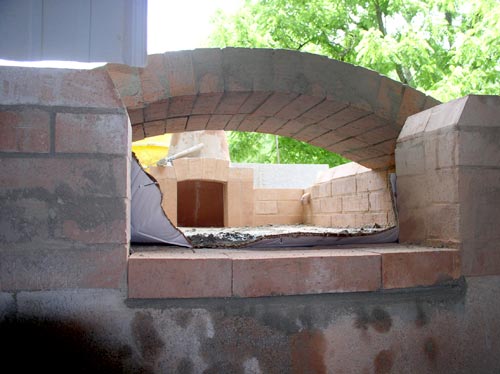
In the above image the arrows are pointing to the inevitable crack development in the masonry and front arch. The vault is temporarily covered with a tarp to encourage complete hydration of the concrete; steam injection pipe is visible. Because rain kept the concrete cladding from drying, and to prevent further cracking, a small fire was built in the oven to hasten the mortar drying process. The metal sheeting in the oven door is a temporary device, made of scrap 5V steel roofing. With the flue exit in the rear, a front opening reducer is required when the fire is first lit to prevent smoke from exiting the front of the oven. After a few minutes burning a solid draft is established up the flue and the door height reducer may be removed.