
Building a Wood-fired Masonry Oven
For this oven construction we decided to enclose the entire upper structure inside a steel-framed and drywalled "house." We chose to use Durock® for the walls instead of regular drywall gypsum board, because it is water-durable, fire proof, and mold-resistant. It would also protect the upper layers of insulation batting we intended to put over the concrete masonry mass (shown in subsequent images) and form the surface for the rock facing which would finish the outside of the oven. Just out of curiosity, we put a torch to the Durock® to see if it would ignite under direct flame. All it did was get red, but no flame and no smoke.
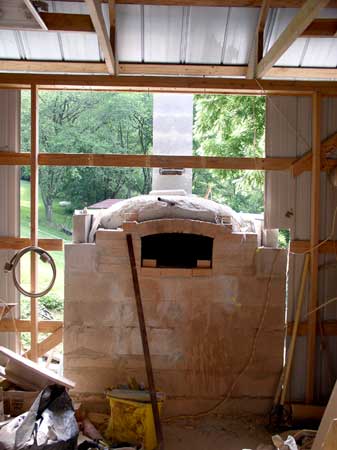
View from inside the unfinished bakery showing the completed concrete cladding over the oven dome, and the chimney blocks in place. Just visible under the crosswise 2x4 remaining from the removed wall, you can see the horizontal placement of the chimney damper.
The baking hearth height at the oven door is 42 inches from the bakery floor, which makes it convenient for the baker to manage the fire and load loaves into the oven, without excessive stooping and bending.

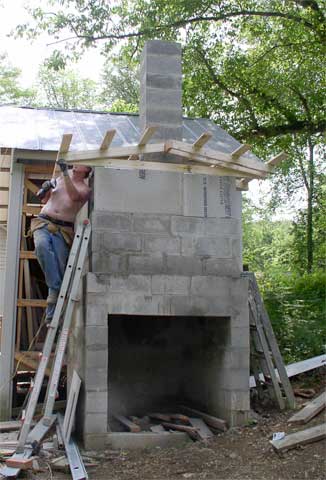
In the image above, the steel framing studs are in place, with weather and fire resistant cement Durock® covering both sides, interior and exterior. The roof framing is being completed.
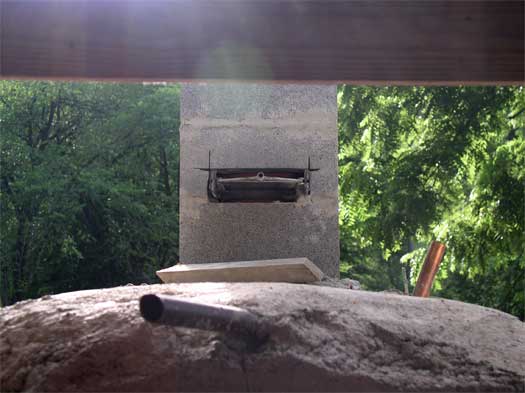
Detail image of the horizontal flue, the steam supply pipe (out the front of the cladding) and mechanical analog thermometer sensor conduit (right side).
Framing up the roof; the completed chimney, and Durock® cement board in place on walls around the oven dome. The high foundation created a space underneath the structure for easy access to the ash dump.
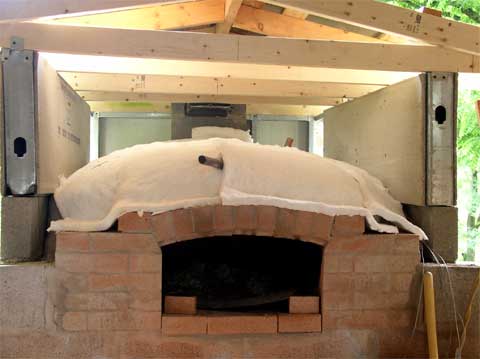
Fiberfrax® brand of high temperature refractory ceramic fiber insulation batting placed over the concrete cladding. Two layers (3 inches) of ceramic insulation were used before we proceeded with ordinary fiberglass insulation as noted in the image at right. A total of 21 inches of insulation, concrete cladding, and brick are in place over the oven chamber. With all that insulation there is very little heat loss from the masonry structure. The oven face inside the bakery is only slightly warm to the touch. After firing for several hours and recording cladding temperatures of 700° – 800°F (thermocouple readings), the temperatures outside the insulation are the same as ambient air temperatures (checked with an infrared thermometer).
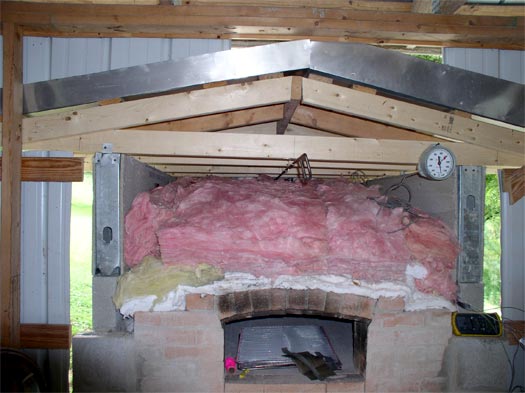
In this image you can see the gauge for the analog thermometer (not in its permanent place), the thermocouple readout device (lying on its side next to the brick, lower right), and the metal handle for the chimney damper (above the insulation). The damper handle is suspended through loops attached to the oven's ceiling rafters. It is easy to push and pull this level to open or close the damper. In this application, there is no such thing as "too much" insulation.
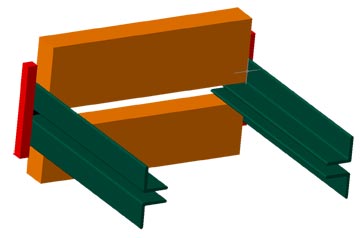
Mock-up drawing of the flue damper that was given to the machinist so he could construct what we needed. The steel runners (green) allow for easy manipulation of the damper, sliding it in and out of the flue.

Well, it's coming right along. No flue cap yet, just trying to keep the rain out.