
Building a Wood-fired Masonry Oven
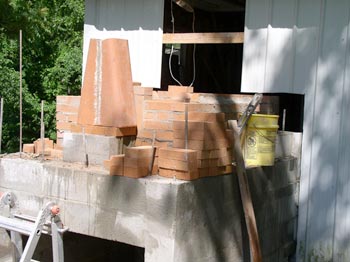
Chimney construction using standard flue tile. This was a single 8x12x24 inch flue tile sawn sideways on an angle using a diamond blade. Then one piece was reversed, and the two pieces mortared back together, to create a flue design with a narrower opening at the top (8 inches) and a wider opening at the bottom (16 inches). The design creates a better draft than a straight flue would provide. Additional 8 inch square flue tiles were added to complete the height needed for the chimney.
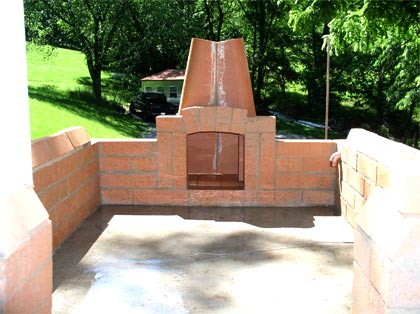
In the right back corner of the oven you can see a copper tubing coming through the brick. This is for steam injection into the hot oven. Copper tubing runs from here around the side and over the vault, under the insulation, which allows it to be heated as it travels the distance to the outlet in the oven. The copper tubing emerges out the front of the oven, making it convenient for manual injection of water to create steam for a crispy crust on breads that benefit from steam injection.
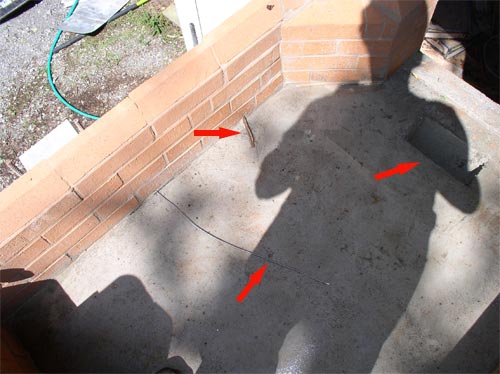
In the image at left the red arrows point out three distinctive elements of our oven. The two far left arrows indicate where the thermocouple sensors are located. The one with the copper tubing lies 4 1/2 inches underneath the hearth's concrete slab. The second wire runs over the surface of the slab and will be covered with the hearth bricking. These thermocouples will give us two readings from the floor of the oven. The remaining arrow in the left image points to the ash dump. In the image above, you can see the placement of the thermocouple wires external of the oven, where they will be buried in the concrete cladding.
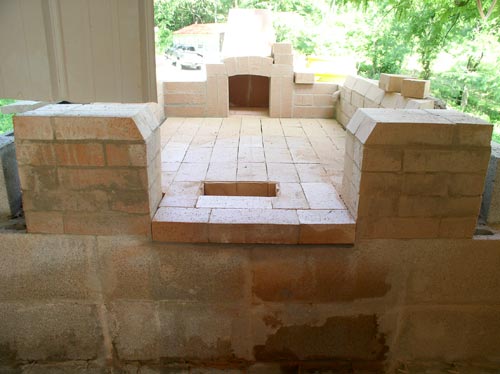
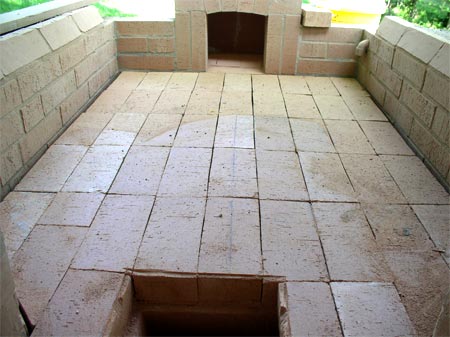
View from inside the bakery showing the completed hearth bricking. The hearth bricks were not mortared into place, but were bedded in a layer of fireclay.
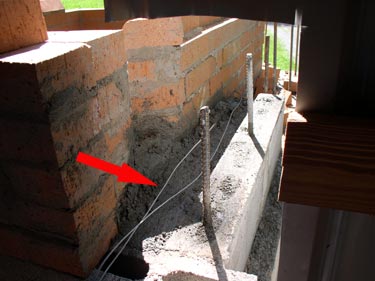
Detail of the hearth wall showing block, poured concrete and brick, and room for Fiberfrax® ceramic insulation between the hot oven wall and the cool exterior block wall.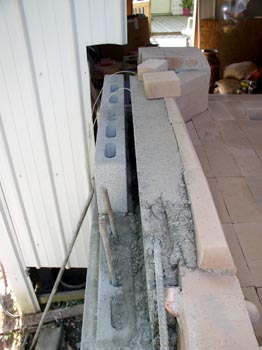
The last run of the side walls are angled and ready for setting the dome arch bricks into place. A wooden form was constructed onto which the dome bricks were fitted. The fire bricks were mortared with refractory mortar to handle the extreme heat from the oven firing. Surface temperatures of more than 900° are attained during a full firing.
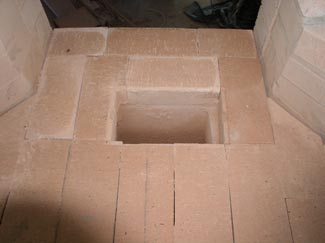
Details of the dry-set bricking on the hearth, and the opening for the ash dump. With use, the spaces between the bricks will fill in with wood ash from the fires. To eliminate inevitable variations between brick dimensions, the surface of the hearth was ground level using a diamond plane so there are no rough spots to catch the peel when loading the breads. The ash dump opening was also trimmed using a diamond blade. The inset cut allows for a steel plate with a drop bail handle to be inserted which will seal off the opening during firing and baking. The plate is easily lifted using a long handled prong that slips underneath the bail to pull it up, lifting the cover out of the way to rake the ashes down the dump. Viola! — no messy and dangerous handling of the ash and hot coals that remain after firing. Other systems either rake the hot coals to the rear of the oven to be dealt with later, or rake them out the oven door and into a non-flammable receptacle that must be removed through the bakery — messy, heavy, and potentially dangerous.